Category: Videomaker Article

CAPTURING PERFECT WEDDING AUDIO, By: Hal Robertson, April 2014 Videomaker Magazine Issue

323-F5-Capture-Wedding-Audio-SECONDARY_3

To start out for the review of this article, I am going to say that it is about getting the best possible audio when filming a wedding.  When filming something such as a wedding, you need to make sure that you get good audio because it’s very important.  You can take some steps to do so by doing things like, putting a mic in the grooms flower, putting windshields up on audio devices, and having multiple audio devices around the area.  If you don’t get good audio, then the video wouldn’t be that good because you wouldn’t be able to hear what people were saying.  So make sure when you film a wedding, or another outdoor occasion, that you take some steps to make sure the audio is safe and good.  This could be helpful if I make a video outside.  I learned how to get good audio when filming.

The link for this article is at: http://www.videomaker.com/article/17145-capturing-perfect-wedding-audio

4 EASY TIPS FOR FORMATTING FONTS

Title- 4 EASY TIPS FOR FORMATTING FONTS    Author- Chuck Peters                 Date- Feb 4, 2014

Fonts-Title_open1. BE BOLD- When you are trying to find a font for your video clips, you should have big, thick and bold text instead of small, thin and swirly for one obvious reason, readability. If something is important enough to put in text in your video, it should be presented in a way that is clear, clean and legible.

2. CHOOSE COLORS CAREFULLY
- Choose a color for your font that contrasts nicely with the background you choose. Certain colors work better than others, some make the it looks very amateurish. But most text on a dark background is most of the time okay. Bright yellow could be a good font color choice if you need to draw attention to a phrase, word or phone number. Dark text on a very light-colored background is okay, but it can be ruff on the viewer’s eyes if overused.

3. BE CONSISTENT- If you are working on a project that uses different pages of graphics with text, “Be wise and templatize”. Pick a look that like the most and stay with it for the entire project. If your fonts change in position, size, and color and style from page to page within a project, you will for sure look amateurish. The key to looking professional is consistency. To stay away from errors you should copy and paste your first title you used and use it as the foundation for each new graphic.

4. STOP SHORT- Be brief. Do not write out long sentences or full paragraphs. Identify the key points. Star wars fans should take note that the long “Lucas scroll” is not a good choice for a good amount of your productions. Does anyone actually remember anything past “In a Galaxy far far away”? There are two exceptions to this rule though: If you need to type a direct quote or a disclaimer. In both cases, it is proper for those cases. Also long text titles followed by silence make viewers uncomfortable.

Picture rights:

Peters, Chuck. “4 Easy Tips for Formatting Fonts.” Videomaker.com. Videomakers, 4 Feb. 2014. Web. 11 Apr. 2014. <http://www.videomaker.com/videonews/2014/02/4-easy-tips-for-formatting-fonts>.


5 TIPS TO HELP ANY VIDEO EDITOR STAY ORGANIZED

Title: 5 TIPS TO HELP ANY VIDEO EDITOR STAY ORGANIZED   Author: Chris “ace” Gates   Date published: February 14th, 2014

VM5Tips1. Build a file structure- Some producers just throw all the files all in one folder all together, which then you can easily misplace/lose something. You should make a folder for that whole project and then make folders inside of that folder to organized the little things within the production. Different examples of folder names would be like, “Audio,” “Images,” and “Final Renders.” Just a few different folders to keep everything organized can make a huge difference.

2. Use a standard naming convention- Don’t name files inside the folders anything confusing that you won’t remember which is which. You should name each day of filming something like for example 02132014 which is an 8-digit number for February 13, 2014 and name things in a system like so you know which is which.

3. Add Metadata- This tip gets overlooked because entering metadata is another chore that you would have to do with all the other task you have to do. Most video editing applications are made to work with metadata and just having a minimal amount of metadata with every clip will make organizing them out so much easier.

4. Back Everything Up- The worst nightmare is losing a whole production’s assets. One drive isn’t enough, and two isn’t any better. Hard drives are not too expensive and it doesn’t take an it department to do this. The little amount of time it takes to back up a project is worth it for sure. If an editor uses a good file structure and standard naming, it then becomes so much easier to organize your backup drives and know it’s in the correct place and it all works cohesively.

5. Keep Common Assets On Hand- There are a good amount of files that a video editor will use over and over again. Each video editor has their own collection of royalty-free music beds, design elements, and sound FX they go back to and use in a pinch. These assets should have their own file structure and should be easily accessible so an editor can put them into the project when they are needed. In order to “future-proof” projects, is that you should make copies of the assets and put them into the file structure. This way, if the project is archived to a long forgotten drive or the cloud, it can be opened up at a later date without the video editor having to relocate missing assets later.

Picture rights:

Gates, Chris. “5 Tips to Help Any Video Editor Stay Organized.” Videomaker.com. Videomakers, 14 Feb. 2014. Web. 04 Apr. 2014. <http://www.videomaker.com/videonews/2014/02/5-tips-to-help-any-video-editor-stay-organized>.


Tools for 3D animation: Autodesk updates it’s

GeodesicVoxel_BindingWell Autodesk is know for not being one of the industry’s giants, but for all the technology they come out with. They just announced that in 2015 they will be come out with an updated creation suit.

These new versions are designed to improve performance and are update to keep up with complex computer graphics. There are so many new tools like The XGen Arbitrary Primitive Generator which makes it easier to create detailed geometry such as hair. Also 3ds Max have a new scene explorer which makes it easier for artists to manage complex scenes.


Autodesk 2015 is now equipped with a plugin that allows a Microsoft Kinect to record your body movements. Maya LT 2015 allows the use of a keyboard and mouse, the common video game controls for people new to 3D animation. This is a very useful software update that utilizes new and old controls.

I could use this if and when I would create 3D animated videos, Mayan LT 2015’s WASD controls would be very useful because i’ve never made 3D animations.

http://www.videomaker.com/videonews/2014/03/autodesk-updates-its-entertainment-creation-suite

Writing Your First Screenplay, By: Kyle Cassidy, September 2013 Issue of Videomaker magazine

316-C10-Basic-Training-PRIMARY

Link for site: http://www.videomaker.com/article/15679-writing-your-first-screenplay

This article is about writing screenplays for your video production.  You should write a screenplay so that others know what you want to happen for your video.  You could tell them, but if it’s a more complex thing, then you may want it written down so that others can understand it.  Another thing, make sure you’re grammatically correct when writing things down so you can look more professional.  It also talks about screenplay programs that you can use, such as Celtx, which is what we use, so that’s how I can apply this to class, because it stretches the importance of writing before filming. I learned that you should write a screenplay before filming.    You should have the parts in a good order, and make sure you explain things as simple as possible to people who may not understand complex plans.

How to Effectively Use in Negative Space in Your Shots, by: Kyle Cassidy, November 2013 Videomaker Magazine issue

318-C10-Basic-Training-PRIMARY

This article is about negative space, negative space brings in viewers attention to certain areas because of the lightness and darkness.  The non negative space is an individual, a piece of machinery, or another thing.  Then the negative space is the area around that object.   Negative space sets the mood as well, like happy, or sad.  Basically, you can play around with negative space to create mystery, or make the viewers wonder what could happen next.  It’s a well used technique especially in horror movies because you can have an area where anything could come from a place at any moment in a vast environment. To have a lot of negative space, you may want to have a clear background, or just take away some objects so there’s not so much going on.  I learned what negative space is in this article.  I can apply this to class by trying to use negative space in a video.

The article link: http://www.videomaker.com/article/15681-how-to-effectively-use-in-negative-space-in-your-shots

10 Problems That Might Break Your Gear When Shooting an Event (and How to Avoid Them) By: Chuck, Peters , April 2014 videomaker issue


323-F4-Set-up-safely-SECONDARY-2

This article lists off the problems that can cause damage to your
equipment when filming.  One of them being that you need
to have your tripod stable, if the legs are close together
then the tripod may fall, so make sure they are as far
apart as possible.  Another issue is strong or loose legs
on the tripod which can also cause it to be unstable.  Then
it talks about different tripods, you may want to get a cheap
one, but in the end, you may want to get a more expensive one.
Moving on to the mounting part of the camera, if not screwed
on properly it will make the camera not go on the tripod
right.  You should also make sure to tighten your lock
on the tripod because if you walk away and it’s not secure,
the camera could fall forward onto the ground. Don’t forget
the space you film, there could be objects in the way,
or areas you shouldn’t put the tripod because it could be
a danger to others. Traffic can make you late, and or jiggle
around your equipment.  If you’re not careful. you can
hurt the cables by having pressure on them, so you should
tape them in place.  Lastly, make sure you have enough area
to set up your camera, and then protect your equipment by
having someone watching it at all times.  What I learned
in this article was the many ways you could have something
go wrong with video equipment.  This can help me by making
sure I follow these steps.

The article link is here: http://www.videomaker.com/article/17146-10-problems-that-might-break-your-gear-when-shooting-an-event-and-how-to-avoid-them

HOW TO SUCCESSFULLY UTILIZE WARDROBE AND MAKEUP IN YOUR PRODUCTION

Title: HOW TO SUCCESSFULLY UTILIZE WARDROBE AND MAKEUP IN YOUR PRODUCTION   Author: Bree Brouwer  Date: March 21st, 2014

shutterstock_126010511Making a video/movie is always people thinking about the tech and all the new gadgets and programs to make them the beautiful masterpiece people want, but the thing is that you could have all the best equipment but if your wardrobe and makeup isn’t up to par then you will definitely have visual problems.

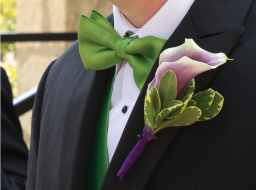
Wardrobe- Avoid all extremes. Harsh contrasts in tone, sparkly attire like jewelry can wreak havoc on video camera sensors even if you do have one of the newer type of cameras. It will result in harsh rendering, wobbly lines, and glare. That is also known as the Moire effect. Dress slim, because people always say how the camera adds ten pounds, so dress flatter than your actors figures, but make sure it still works for their character. Stick with solid colors like pastels, neutrals, greens, and blues. Colors like orange and red might make it look like the actors are glowing. Also be careful with using white as it might work negatively with the camera

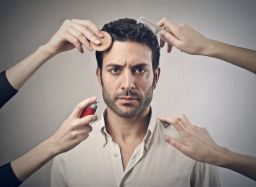
Makeup- Go for a natural look, a whole lot of makeup is for the theatrical productions, so leave it there. Both men and women should even out their skin tone while also not making them look washed-out on film. Remember to powder because just at least one small dab can make a huge difference on camera. Keep hair under control. Men should shave to avoid having five o’clock shadow, and women and men with long hair need to pull it back into a ponytail if it works for the character. Everyone should use hairspray to tame any loose hairs.

What to do when you are not sure-  There are always people to hire to get opinion on the whole wardrobe and makeup you have going on or even people just to do it themselves so you don’t have to deal with it. Even if you don’t have the money to hire anyone, just make a good decision and test everything on camera before shooting for real.

All in all video production is truly the sum of all its parts and wardrobe and makeup is one of those elements that when done right, it can make your final work look like the masterpiece you want it to be.

Picture rights-

Bouwer, Bree. “How to Successfully Utilize Wardrobe and Makeup in Your Production.”Videomaker.com. Videomakers, 21 Mar. 2014. Web. 28 Mar. 2014. <http://www.videomaker.com/videonews/2014/03/how-to-successfully-utilize-wardrobe-and-makeup-in-your-production.>

4 QUICK TIPS FOR CREATIVE CAMERA POSITIONS

shutterstock_39155641Title: 4 QUICK TIPS FOR CREATIVE CAMERA POSITIONS  Author: Chuck Peters Date: March 19, 2014

This article talks about how usually people keep the camera at eye-level which is about 5-6 feet high and that if you can change the camera angle dramatically then it can give the viewer unique and creative perspectives. It can give more interest to the scene then the same placement of shots.

Get down: Good creative camera work is all about finding different points of view that can help/look great. Kneeling or laying down to get a perspective of an ant, but in the industry it is known as a worm-eye view. What this does is makes what your filming look larger than life and many people haven’t seen what it is to see the point of view of their shoes.

Get up: Get on a scaffold, on top of a building or even a ladder. It can give the feeling of omniscience and make what you’re shooting look small. You can use up high type of shots and intercut them with ground level type shots and that would look good.

Inside out: Cameras can go many places that a human holding a camera can. So you can place it in some very precarious positions. You could put a camera in the fridge when someone goes for a late night snack or in a mailbox for when a mailmen delivers a letter. That can give a different type of view that will mix up your shots and look great.

Slide to the side: A lot of shots at eye-level can easily be changed so easily by slanting them to change and give it an uncomfortable, even anxious type of feel. If that is what you need/looking for then it would be perfect.

” The ultimate takeaway is this: don’t just shoot every shot from eye level. Look for opportunities to employ creative camera positions, and be selective about perspective.”- Chuck Peters

Picture rights-

Peters, Chuck. “4 Quick Tips for Creative Camera Positions.” Videomaker.com. Videomakers, 19 Mar. 2014. Web. 24 Mar. 2014. <http://www.videomaker.com/videonews/2014/03/4-quick-tips-for-creative-camera-positions>.

Making videos using 7000 post it notes

We all know what post it notes are as they are a useful tool for jotting down notes for classes, studying, TV shows, or just general ideas you though were important. This guy was able to use his knowledge in Final cut pro and 7000 post it notes to make an awesome stop motion animation of Mario and Pacman.

Zach King a member of the youtube community who built his channel from Final Cut tutorials. His information he posted was useful on real life videos such as Real Life Portal Gun and Jedi Kittens which also gave him credit. When he had a big enough audience he decided to use his experience to make a stop motion animation using 7,000 post it notes and a home made dolly camera.

maxresdefault

He said that recreating one minute of video would mean taking 1,440 individual photos. He also said that unlike traditional videos stop motion animation is much harder to produce. Usually videos are at 24 frames per second, to recreate this aesthetic video you’ll need to re-create each individual frame.

This article will be useful when if I choose to make a stop motion animation video, because it gave me an example of how long a stop motion animation is. I also thought that it was just pretty cool.

http://www.videomaker.com/videonews/2014/03/how-to-make-a-video-using-7000-post-it-notes