Category: Uncategorized

4k Resolution!

I read Beyond HD: 4K Resolution is Coming by Dan Bruns, who is an Associate Multimedia Editor at Videomaker.

In the article that I read, it talks about how Jim Jannard’s and his company, RED DIGITAL CINEMA, and how in 2007 they came out with a new camcorder called the RED. It talks about how this camera can shoot at 4K resolutions for a much lower price than comparable 4K camcorders. This camera (RED) also demonstrated its Scarlet-X line of cameras that record images at 24 frames per second in 4K resolutions for less than $10,000, making 4K affordable for high-end users. For those with even shallower pockets, JVC announced a (prototype) 4K camcorder with a fixed lens that should cost around $7,000. Currently, the camcorder records four simultaneous 1920×1080 feeds to four separate SD cards and stitches them together to get the 4K resolution. Though it’s not elegant getting 4K, it does so at an affordable price for prosumers.

I learned that even though these cameras cost a lot, its worth it. I would rather spend the money on a camera that is expensive that shoots at great resolution, then to spend the money on a cheap camera that doesn’t shoot good resolution.

I can apply what I learned from this article in class, for when we shoot some movies. Even though we don’t have one of these fancy cameras, I still learned about how great these cameras operate, and I would definitely would be interested in using one.

Camera Shots

In the article I read, I read about the types of shots that make viewers very interested in the movie, or show.  There are many different types of shots that you can make with a camera. High, low, medium shots, close-ups, and many others. Very interesting shots to me were the high angle shots. Even though high angle shots may be hard to accomplish, it looks great in a movie and shows a different perspective on things. This is because we are so used to seeing the world from 5-6 feet off the ground. Around eye-level. But with shooting high shots or low shots this makes things look interesting and tells a better story. To achieve this people may use ladders, trees, and cranes or booms. The best way to achieve this great shot is through using a crane or boom. Booms allow you to move the camera from high elevations to low elevations to get a great establishing shot or in other cases follow a car from a high elevation and by the time the car stops the camera would be at the same height as the car.

Low shots were quite common a long time ago but were hard to achieve. No a days there are special cameras to get those great low shots that you have always been wanting to get.  Low shots while moving may be hard to get. So that is why cameraman come up with great ideas on how to move the camera while shooting videos. For example, in the musical Royal Wedding, They mount a camera to the floor of a rotating set so that it made it seem like the actor was running up and down walls.

To get sideways shots you can put your camera on a dolly then set it on something just like train tracks and it follows it in a very calm, fluent motion without rattling.

Camera angles determine the movie and the mood of the movie. Movies are made up of many camera angles. When you put all these shots together you make a movie. All these shots make a movie great. The high and low shots usually are used as an entrance or ending but can be used at anytime. These shots give a great perspective on what is going on at the time and establishes the movie. This article was a great help in explaining the use of dolly’s, and cranes. Also gives me a new perspective on what the different heights of shots have on the product and the establishing of a movie.


The History of Video

Jennifer O’Rourke | April 2012

http://www.videomaker.com/article/15575/

The article talks about the history of video and in the early days how it was an elitist’s profession. The first home movies were made using film, and the consumer film camera only came out for special occasions. For many one roll of film would last for an entire year. When Video first arrived it was a costly hobby or business. The first camcorder was ranged from $1,500-$2,300 and the footage was horribly lacking in quality. Video has evolved tremendously from its cumbersome and expensive beginnings.

If you go to the link, it will show you a timeline of the history of video. In 1986 Videomaker launched its first issue in June.

I think that it was cool looking at where the type of video we use today came from and how it started.

Tips on Doing Voice Overs

Three basic rules when doing voice overs at your own home with talent. First Find a good room in the house where you can record your voice over. What qualifies as a good room? A room with few windows, if there are windows shut them. This prevents any sounds coming from outside. Have all fans and electronics off. Also use thick, cloth-like materials on hard surfaces. This will stop any sounds reflecting off the wall and giving you an echo. Secondly get a good mic. USB is a good quality mic for a fair price, XLR is what the professionals use, so it’s a little more pricey. Third basic rule, try to have it recorded directly to your editing software. When you record your voice over on something other than that you take the chance of losing your audio. other basic tips Get a mic stand. Never let the talent handle the mic! You will hear every movement they make and that is very unprofessional. Another good tip would be to have a pop filter. This changes the audio significantly! These pop filters can be found in your local hardware stores or even in your own house. Finally have your talent wear headphones. Let them hear what they are saying. This will make them feel more comfortable and will give them a good idea of how the voice over will turn out.
From this article I have learned great tips on how to record good voice overs in my own home!

Heres the link http://www.videomaker.com/video/watch/tutorials/710/how-to-record-voice-overs/

dpc27

Aside

Camera shots. There are so many. High ones, low ones, far ones, close ones. Every set of camera angles are done for a certain purpose.
There are three main reasons why camera angles are done: the first is style. In director Danny Boyle’s films like Slumdog Millionaire, or Trainspotting, 28 Days Later and his most recent 127 Hours he uses very gritty, provocative shots. It’s a style that is all his own. The second reason is mood. For example in Rodrigo Cortes’ film Buried, he uses very up close shots. His reason for doing this was because the whole movie takes place in a coffin under ground. He wanted to convey a feeling of claustrophobe. It makes you understand what the feel of the scene is and what the character(s) are feeling. Last reason, simply because the shot looks cool, check out any Spielberg film. He always has very interesting shots in his films.
From this article I have Learned that everyone uses different shots for different purposes and sometimes the reasons overlap.
http://www.videomaker.com/article/15363/

DIY Sci-Fi Sound Effects

Hal Robertson | April 2012

http://www.videomaker.com/article/15352/

Have you ever wanted to make your own Sci-Fi sound effects? You can use many different recording devices that run on batteries to record audio “in the field”. Pocket recorders would be at the top of the list, from brands like Zoom, TASCAM, Sony and many others. You can also use, a laptop, iPod, iPhone, iPad, and your own video camera. To make a laser blast, you can use a Slinky toy and suspend the toy from a light stand and stretch it till it just reaches the floor. If you place a microphone inside the coi somewhere near the middle and tap the Slinky with something hard it will make an instant laser blast.

This article taught me how to make really cool sound effects. I think that it could be used to make sound effects in class. LIke if we were to be filming around school, we could easily make a cool sound effect.

Editing Styles

Movie Poster for Snatch

Since the beginning of the movie making business things have changed drastically. Especially in post production. There are many different editing styles used in film that not many audiences pick up on.
Some movies have quick cut editing and others have long shots that go on for a while. Guy Ritchie’s Snatch is perfect example of a quick cut editing style. There is not one shot in there longer five seconds. A viewer will especially notice this in the action scenes. The Bourne trilogy (soon to be a quadrilogy) is know for their intense action scenes being so quickly cut together. On the other hand there are films that have very long shots cut together. A prime example of this would be John Carpenter’s Halloween. Halloween has shots that go on for more than fifteen seconds! That is three times longer than the longest scene in Snatch! A more recent picture that has long shot editing is the movie Michael Mann’s Collateral. Every director has their own vision for their films and they don’t always stick with the same style. Depending on the genre of the film, or the overall feeling of it their editing styles vary.
What I have learned from this article is that everyone has their own style and not one is any better than the other.

Commercial Production

Mike Wilhelm | March 2012

http://www.videomaker.com/article/15610/

Whether you’re dealing with a new client or someone that you have been working with for years, helping the client achieve their goal is your primary focus, but its also important to build a level of trust. Three tips will help guide you to a better relationship with your client while filming a commercial.
It’s typical that a business owner that you work with will love to talk about what they do. In your first meeting with them you should gather information from them, fin

d out exactly what their business does and how they do it. The smallest detail can come in handy when shooting. You also want to make sure the client gets what they want to out of the production. This often means bending to their ego. In order to produ

ce the best commercial you need to earn their trust. Don’t be cocky but it helps to casually talking about your experience. By following these three simple tips, you will be able to grow and maintain a level of trust with your clients.

This article taught me that no matter who you are working with you need to trust them and their opinions. Also to not shoot down someone else’s ideas. Everybody has ideas that could work and be better than the ideas you have.

Beginners Lighting Needs

Have you ever noticed how all movies have different looks? Everything from a Charlie Bit my Finger home video to a Michael Bay’s Transformers film, and everything in between has a different look. And that look comes through camera quality, editing and cinematography. Lets focus on cinematography.
Not many people realize, but without good lighting (cinematography) the film’s quality just looks flat out bad. People can improve the quality of there videos through simple little knickknacks. For example lights: They don’t have to be anything fancy. To the right of this article you will see a light that goes for about $10 bucks at your local home depot. These 
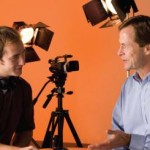
lights are effective and cheap. Another lighting necessity, especially for outside shoots, are reflectors. Reflectors make a huge difference when lighting a person. Opposed to having shadows cast all over the person’s face, now we see there face light up. The light gets controlled with this tool, you control it’s direction. We notice things about that character’s appearance that we may not have noticed before thanks to this. Reflectors can go anywhere $10-$20 depending on size. A diffuser, quite the opposite of a reflector, simply tones down the light. If the person’s face is too lit up, then diffuser makes the light less powerful. With the diffuser the light is more evenly distributed over the object. Some of these go for as low as $3! Any film maker can spare $3 bucks.

From this article I have found that simple lighting needs are quite cheap and are good quality.- dpc

http://www.videomaker.com/article/10053/2/

Lighting Gels

When we hear the word “gel” most of us think of the stuff that people put in their hair. In making movies it has to do with lighting.
Have you ever noticed that sometimes in a sad scene the lighting appears in cool, dark colors? Or in an exciting, scene we see hot colors that get your heart pounding? The cinematographer of the film didn’t just say “I’m feeling sad today, lets make this scene blue”. He was trying to set the mood for the scene. These different lighting techniques The Belated Birthday Girl's Kill Bill PC wallpaper, made with her own fair hands from a couple of framegrabs from the DVD trailers. Good, isn't it?
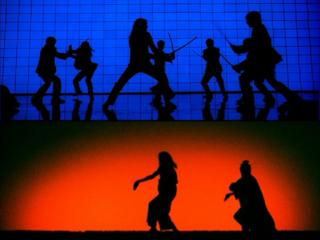
convey the emotions the actors are feeling, the context of the setting and/or a meaning behind an overall message. Without this lighting technique we would miss the emotions of many scenes.
For example, in the film Kill Bill Volume 2 when we see what Beatrix Kiddo’s training was like. The lighting is red, it’s gets you, for lack of a better word, excited. We see her karate chopping and kicking like the female version of Bruce Lee. This is makes the audience get pumped up! Without these different lighting techniques, films wouldn’t convey the emotions as well as they should.
Reading this article has taught me that lighting not only makes the picture beautiful, but supplies emotion too.- dpc27

A link to the article is here http://www.videomaker.com/article/13544/