Author: Contributor

4 QUICK TIPS FOR CREATIVE CAMERA POSITIONS

shutterstock_39155641Title: 4 QUICK TIPS FOR CREATIVE CAMERA POSITIONS  Author: Chuck Peters Date: March 19, 2014

This article talks about how usually people keep the camera at eye-level which is about 5-6 feet high and that if you can change the camera angle dramatically then it can give the viewer unique and creative perspectives. It can give more interest to the scene then the same placement of shots.

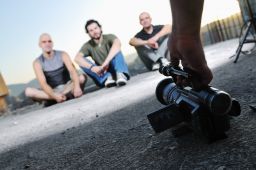
Get down: Good creative camera work is all about finding different points of view that can help/look great. Kneeling or laying down to get a perspective of an ant, but in the industry it is known as a worm-eye view. What this does is makes what your filming look larger than life and many people haven’t seen what it is to see the point of view of their shoes.

Get up: Get on a scaffold, on top of a building or even a ladder. It can give the feeling of omniscience and make what you’re shooting look small. You can use up high type of shots and intercut them with ground level type shots and that would look good.

Inside out: Cameras can go many places that a human holding a camera can. So you can place it in some very precarious positions. You could put a camera in the fridge when someone goes for a late night snack or in a mailbox for when a mailmen delivers a letter. That can give a different type of view that will mix up your shots and look great.

Slide to the side: A lot of shots at eye-level can easily be changed so easily by slanting them to change and give it an uncomfortable, even anxious type of feel. If that is what you need/looking for then it would be perfect.

” The ultimate takeaway is this: don’t just shoot every shot from eye level. Look for opportunities to employ creative camera positions, and be selective about perspective.”- Chuck Peters

Picture rights-

Peters, Chuck. “4 Quick Tips for Creative Camera Positions.” Videomaker.com. Videomakers, 19 Mar. 2014. Web. 24 Mar. 2014. <http://www.videomaker.com/videonews/2014/03/4-quick-tips-for-creative-camera-positions>.

Videomaker Article – March 14th, 2014, By: Jennifer O’Rourke, March Issue 2014 Article Title: Nikon 1 V3 Mirrorless Cameras with Improved AF and Fast Continuous Shooting Announced

In this article it talks about lenses for cameras, and how they can keep sharp focus even on objects that are moving.  It also talked about mirror-less cameras that are lighter, and smaller, plus, they take great footage.  Lastly, this was based on the Nikon, V3, which is the new lens for staying in focus even when the objects are moving.
I learned from this article, the different lenses of cameras, and their effects.  How I could apply this to class is, I don’t think I really could use this in class unless we had those special lenses for the camera.

To read the article, here is the link: http://www.videomaker.com/videonews/2014/03/nikon-1-v3-mirrorless-cameras-with-improved-af-and-fast-continuous-shooting-announced

Making videos using 7000 post it notes

We all know what post it notes are as they are a useful tool for jotting down notes for classes, studying, TV shows, or just general ideas you though were important. This guy was able to use his knowledge in Final cut pro and 7000 post it notes to make an awesome stop motion animation of Mario and Pacman.

Zach King a member of the youtube community who built his channel from Final Cut tutorials. His information he posted was useful on real life videos such as Real Life Portal Gun and Jedi Kittens which also gave him credit. When he had a big enough audience he decided to use his experience to make a stop motion animation using 7,000 post it notes and a home made dolly camera.

maxresdefault

He said that recreating one minute of video would mean taking 1,440 individual photos. He also said that unlike traditional videos stop motion animation is much harder to produce. Usually videos are at 24 frames per second, to recreate this aesthetic video you’ll need to re-create each individual frame.

This article will be useful when if I choose to make a stop motion animation video, because it gave me an example of how long a stop motion animation is. I also thought that it was just pretty cool.

http://www.videomaker.com/videonews/2014/03/how-to-make-a-video-using-7000-post-it-notes

WonderRig Elite DSLR

You’ve seen those amazing videos that are stable and don’t have any shaky shots and wanted to create one of those videos, but only had shaky shots well now all your looking will come to a halt. You won’t need to search any longer because with the WonderRig Elite DSLR you won’t have anymore shaky shots.

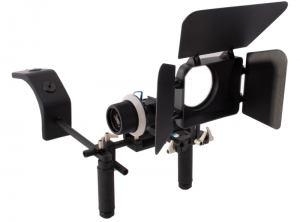
First let us talk about what you’ll get for materials before you go and spend your money, The WonderRig Elite DSLR will include these items; shoulder support stabilizer, reversible follow focus, 15mm rod system, matte box and a shoulder accessory support pad. The materials are made of metal except for the matte box and barn doors which are made of hard plastic.

323-C5-Wonder-Rig-PRIMARY


Right now you may be thinking WOW! I need to go get this now, but with the WonderRig Elite DSLR there are both strengths and weaknesses just like every other thing in life. It’s strengths include; Metal construction, quality follow focus and it’s weaknesses include; grips slip under any type of strain and the shoulder support isn’t made for everyone.

For more information please read WonderRig Elite DSLR Video Rig Review at http://www.videomaker.com/article/17073-wonderrig-elite-dslr-video-rig-review an article Chris Monlux

Picture taken from http://www.videomaker.com/article/17073-wonderrig-elite-dslr-video-rig-review

Week of 3/21

Tried to organize and recover equipment for the program, next week i will try to put out a webcast for I’m not sick anymore. Will try to organize equipment with labels so we have a system to rely on to know what is signed out where, so there shouldn’t be a confusion of where stuff is.

Week of 3/14

Finished critiques for Star Wars Episode IV: A New Hope, Indiana Jones and the Raiders of the Lost Ark, and my promo video. I’m still waiting for my dad to pick out the select few songs from the video for me to edit further. Will try to do a web cast this weekend, cold, and schedule permitting. If nnot then will try to get 1-2 out before the end of the quarter.

Green Screen Improvements

Light_green

Title: 5 Green Screen Tips

Author: JR Strickland

Published November 29, 2013

     Five things to keep in mind when using green screen is camera angle, lighting, props and sets, blocking, and panning. Don’t just stand directly in front of the camera and stare into it unless it’s necessary, it’s boring and usually looks bad. Keep the actor moving, with reason, and using props will help make things look more real and interesting. Plan out your background and how you want everything to look, also make sure you tell everyone you’re working with.

     Do to the fact I’ve never used green screen this is all new information and things I never even thought about before. I probably would have had the actor not interacting with much because I thought it would show how unreal the background is. I’m still not so sure about lighting, I’ll probably have to play around with it to really understand how it works with green screen.

     I hope to use green screen before the end of the year and I’ll try to keep in mind not using it when I don’t have to and adding plenty of props and different camera angles.

http://www.videomaker.com/videonews/2013/11/5-green-screen-tips


4 BACKGROUND TIPS TO MAKE YOUR ACTION CAM VIDEO LOOK PROFESSIONAL

Title: 4 BACKGROUND TIPS TO MAKE YOUR ACTION CAM VIDEO LOOK PROFESSIONAL  Author: Brian Teal  Date: March 04, 2014

bg2_0This article states how you can make an awesome looking background for an action scene without using a green screen and using the natural terrain. Brian teal states “It just takes a little setup before shooting your HD video.” All of which making it look cooler then some green screen background compared to the real outdoors.

1. Use the weather to you advantage. Use the natural light to light up your shot or if their is a misty background the darker colors will stand out to the audience and look better and out the focus on him. With something like having a bright sun the trick is to angle it correctly so the sun doesn’t take away from what you are trying to film and getting it to look good, but it done perfectly then it looks amazing.

2. Use backgrounds to show different angles. Like if you see something in the background you would like to include don’t just want a basic shot find something around like a log, stump, rock, or even the ground to give a different angle with what you want in the background and liven up your shots a bit.

3. Realize whats in your background. Make sure you take a trial run if you plan on panning or moving your camera in anyway ad there might be something that could come up that could block your view or be in the background that you don’t wan. What if you had a great take and you mess it up because you didn’t check your surroundings, like Brian teal says “Don’t be a victim of an unsuspecting photobomb, especially from an inanimate object!”

4. Preform a trial run. Have the actors or person that you are filming do a practice run. While you are filming the way the background interacts with the camera and the actor might need tweaking, like is the background not working well and causing you to not film what you want. All in all use it just to make sure everything looks great!


Pictures rights:

Teal, Brian. “4 Background Tips to Make Your Action Cam Video Look Professional.”Videomaker.com. Videomakers, 04 Mar. 2014. Web. 14 Mar. 2014. <http://www.videomaker.com/videonews/2014/03/4-background-tips-to-make-your-action-cam-video-look-professional>.


Storage Buyer’s Guide – Because You Gotta Store Your Stuff! By: Russ Fairley. Videomaker magazine, issue January 2014.

In this article, I read about different storage for video.  Particularly the importance of storing footage and what things you can store it on.  The reason it’s important to store footage is because you could have important footage of someone who you might not get to have footage of again.  In general though, it’s important because if you lose your footage, that’s time wasted.  Some of the storage units this article discussed were ones such as, RAID.  This storage device has a mirroring option, so it has two copies of the footage.  Therefore making the device have 4 Terabytes.  Although, you only get to use two of those because of the mirroring feature.  More storage possibilities are ones such as, external hard drive, and internal hard drive.  External hard drives plug into our computers with wires or USB.  Where as internal hard drives is the amount of storage a computer has.  What I’ve learned from this is, you have multiple options to store your footage so it doesn’t get lost, because if you’re by yourself or working with multiple people, you wanna make sure you keep your footage safe.  A way I can apply this to class is, we already store our footage on the computers hard drive, so this article just states the importance of it.
The link to this article is: http://www.videomaker.com/article/17162-storage-buyer%E2%80%99s-guide-because-you-gotta-store-your-stuff

the photo is from the article I read, the link is above

Screen Shot 2014-03-10 at 9.09.56 AM

LIGHTING VIDEO: FIVE IMPORTANT ASPECTS OF ANY LIGHTING SETUP

imgres-11Title: LIGHTING VIDEO: FIVE IMPORTANT ASPECTS OF ANY LIGHTING SETUP Author:  Chuck Peters   Date Published: March 04, 2014

This article speak about how you can go and buy a new camera, a very expensive camera but all it will do is show out flaws of your video making even more especially if you don’t have good lighting quality and talking about how lighting can make a film much better then with amateur style lighting. Don’t worry as much about what your shooting with but what you are shooting at.

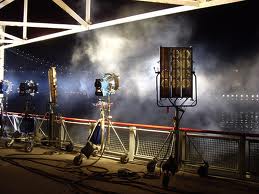
Things that will make your lighting better are for starters, the position of your lights just by adjusting the length, direction and angle of shadows that it creates. A light source positioned near the video camera creates what is known as flat lighting. Flat lighting is low on the creativity scale, and neutral in terms of emotion. As the light is moved farther to the side of the scene it becomes increasingly more dramatic and emotional.

The brightness is also a factor. You use a lot of light, Known as High key, and everything is brightly lit. That would be used to show a happy upbeat type of seen. Then there would be low key which is more dramatic and make it more dark by there being lower levels of light.

There are also the different qualities of lighting like Hard light bring out wrinkles and noticeable things upon their face and make a subject look strong, or scary. Hard lighting can also a subject seem intimidating if that is what you are searching for. Soft lighting is opposite of this as you can imagine by the names. Hard light pulls out the angular features of a face and draws attention to wrinkles and creases. It sort of hides wrinkles and things like that and make people seem more approachable and friendly. It really all depends on what you are trying to portray.

There is also the shape of light which is controlling and focussing the light to what you want it to show. Light shouldn’t just wash over everything. It should be put in separate places and mostly were its wanted, to show depth in your film.

Lighting color is an important factor of how you can change the lighting to like lets say yellow or amber to give the scene more of a warm feeling or of just sunset or sunrise. Many different colors can make it seem different like light blue can make the scene look like it winter and there are so many more. Shots can be tweaked by using a small amount of color and it changes the whole aspects of the scene.

So overall for this article chuck peters the author of this article who is a 3-time Emmy Award winning producer says it perfectly here with this statement “Give careful consideration to your lighting setups. The secret to shooting fantastic footage isn’t to buy a better video camera, it’s to take greater control over what happens in front of the video camera’s lens.” I couldn’t of said it any clearer and better then that.

Rights of picture:
Peters, Chuck. “Lighting Video: Five Important Aspects of Any Lighting Setup.”Videomaker.com. Videomakers, 04 Mar. 14. Web. 07 Mar. 2014. <http://www.videomaker.com/videonews/2014/03/lighting-video-five-important-aspects-of-any-lighting-setup>.